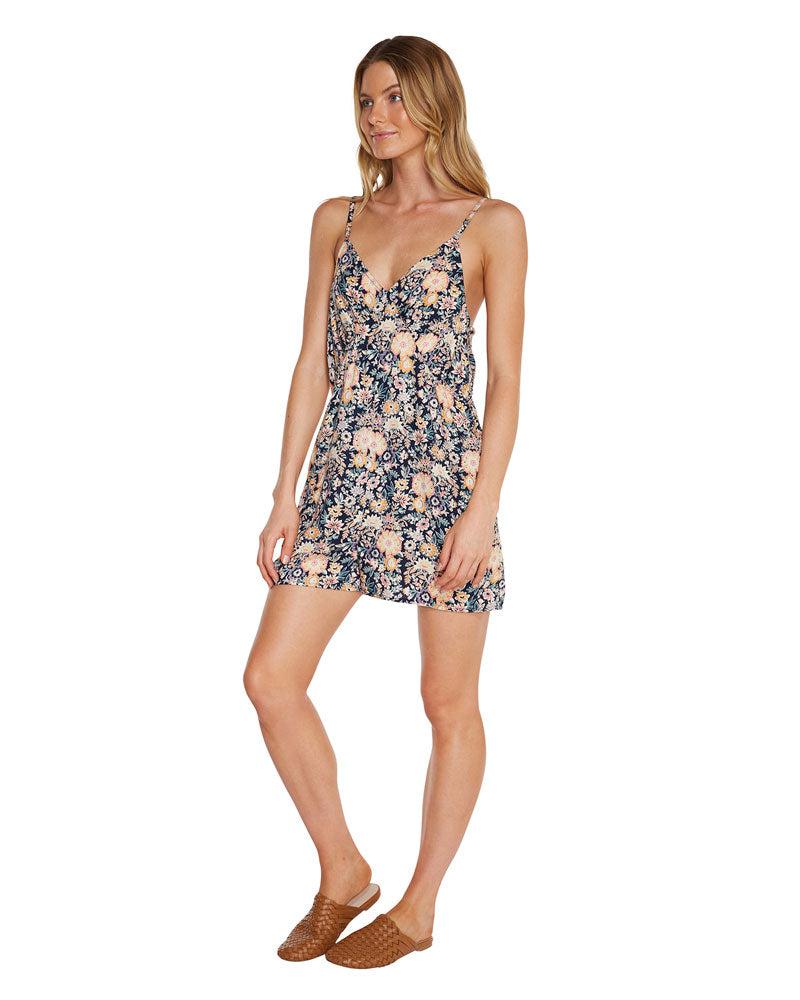
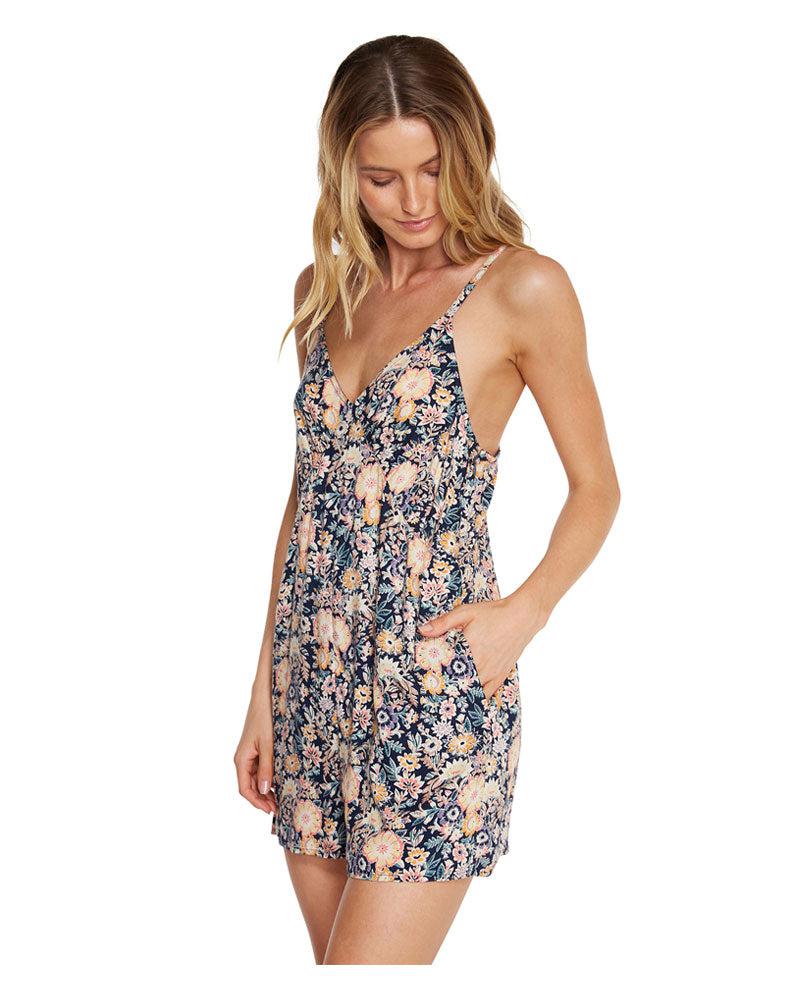
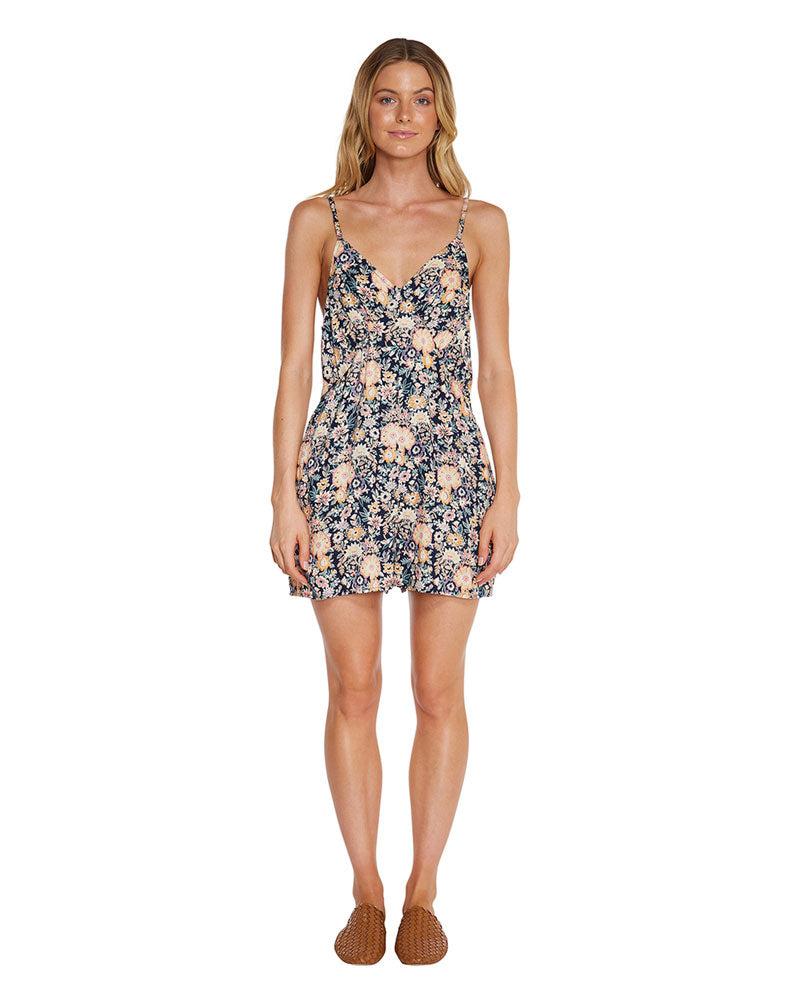
O'Neill Castaway Playsuit
or make 4 interest-free payments of
$12.00 AUD
fortnightly with
More info
You Save: $32.00 (41%)
Hurry up! Sales Ends In
Embrace summer with the O'Neill Castaway Playsuit, with a bright floral print and comfortable lightweight design.
Style: Playsuit
Fabric: 100% Viscose
Fit: Relaxed fit
Features: Inseam Pockets And Adjustable Straps
Here are our links to both sizing guides and buying guides on our products, all these are here to help you make an informed decision on what size or product will work best for you.
Vest Size Guides
Wakeboard Buy Guides
Wakesurfer Buying Guides
WARRANTY POLICY
Let’s face it, we all ride hard and the toys we play on are bound to take some abuse. Nearly all manufacturers understand this and provide a warranty against defects and workmanship. Each new product sold by Skiforce is covered by the individual manufacturer’s warranty. Please check the manufacturer’s website for information regarding their specific warranty policy. The manufacturer will make all warranty decisions. All return shipping costs are the responsibility of the buyer. As an Australian Wake and Waterski Retailer we can only warranty products purchased from our store and website. Please have proof of purchase at Skiforce available when dealing with any warranties.
STEPS FOR PROCESSING WARRANTIES
Step 1. Determine whether the damage should be covered by warranty. Here are a few things that are NOT covered by warranty:
• Normal wear resulting from standard usage that occurs over time. (chipped topsheet, sun faded topsheet, etc)
• Damage resulting from contact with objects. (Rails, kickers, logs, stumps, little kids, skiers, etc.)
• Damage to product resulting from improper care or unnecessary roughness. (throwing it around on the bank, product flying off of board racks, etc)
• Parts, hardware, accessories that were lost or have gone missing AFTER receiving your shipment.
Step 2. Email us about your warranty and include CLEAR and detailed pictures explaining the problem. Blurry pictures will not be accepted.
If you have any questions, don’t hesitate to give us a call. We want to see you back out on your product as much as you want to use it and try to get you a response within 48 hours of receiving the product.
Step 3. We will contact you with further instruction.
The next step varies by manufacturer and we will provide you with all the details for the next step. If your warranty claim is accepted you will have to ship your product back to us so that we can confirm the warranty with the manufacturer. Return shipping on warranty claims is the responsibility of the buyer. The manufacturer or Skiforce will cover shipping charges on all items replaced or repaired under warranty.
Let us know if you are in a rush and would like to pay extra for express shipping on your warranty return.
MY BAG
SUBTOTAL
MY WISH LIST
MY ACCOUNT
SIGN UP
Enjoy the benefits of registering:
- Order: view Order History, track and manage purchases and returns
- Address Book and Card Wallet: safely store delivery and payment details for faster checkout
- Saved for later: wish list your preferred items and track their availability
SIGN UP
HERE TO HELP
Have a question? Contact us:
Customer Services
Call Us: (03) 9470 1822
Mon-Wed: 9:00 am - 5:30 pm
Thurs-Fri: 9:00 am - 9:00 pm
Sat: 9:00 am - 5:00 pm
Sun: 10:00 am - 4:00 pm
SHIPPING
Free shipping delivery on all orders of $50 or more.
PAYMENTS
Accepts the following payment methods:
Credit Card: Visa, MasterCard. The total will be charged on placement of order.
PayPal: Shop easily online without having to enter your credit card details on the website.
ZipPay: Own It Now. Pay Later.
AfterPay: Shop Now. Enjoy Now. Pay Later.
RETURN POLICY
For our returns policy please see our Returns & Exchanges Policy.
Pro Fit & Pro Fit 2
Happy Fit
Ladies Fit
Mens
Womens
Kids
Mens Vests
Womens Vests
KGB Men's Vest, Wavelength Men's Vests, Radar Vests & Ronix Vests
Size | Chest (cm) | Weight (kg) |
XS | 92 | 40-60 |
S | 100 | 40-60 |
M | 104 | 60-70 |
L | 108 | 70+ |
XL | 112 | 70+ |
XXL | 116 | 70+ |
3XL | 122 | 70+ |
4XL | 126 | 70+ |
KGB Men's Vest, Wavelength Men's Vests, Radar Vests & Ronix Vests (with side panal)
Size | Chest (cm) | Weight (kg) |
XS | 100 | 40-60 |
S | 108 | 40-60 |
M | 112 | 60-70 |
L | 116 | 70+ |
XL | 120 | 70+ |
XXL | 124 | 70+ |
3XL | 130 | 70+ |
4XL | 134 | 70+ |
IVY Women's Vest, Wavelength Women's Vests, Radar Vests & Ronix Vests
Size | Chest (cm) | Weight (kg) |
6 | 80 | 40-50 |
8 | 84 | 40-50 |
10 | 90 | 50-60 |
12 | 94 | 60-70 |
14 | 100 | 70+ |
16 | 104 | 70+ |
18 | 116 | 70+ |
IVY Women's Vest, Wavelength Women's Vests, Radar Vests & Ronix Vests ( with side panal)
Size | Chest (cm) | Weight (kg) |
6 | 88 | 40-50 |
8 | 92 | 40-50 |
10 | 98 | 50-60 |
12 | 102 | 60-70 |
14 | 108 | 70+ |
16 | 112 | 70+ |
18 | 124 | 70+ |
KGB, IVY Kids Vest, Ronix Vests
Size | Chest (cm - adj to max) | Weight (kg) |
8T | 76 | 22-40 |
10T | 80 | 22-40 |
12T | 86 | 40-60 |
14T | 90 | 40-60 |
KGB, IVY Kids Vest, Ronix Vests
Size | Chest (cm) | Weight (kg) |
8-10 | 84 | 22-40 |
12-14 | 94 | 40-60 |
KGB, IVY Kids Vest, Ronix Vests
Size | Chest (cm - adj to max) | Weight (kg) |
0-1 | 55 | 10-15 |
0-2 | 72 | 10-15 |
4-6 | 80 | 12-25 |
Wavelength Men's Buoyancy Suit / Vortex Mens Barefoot Suit
Size | Chest (cm) | Waist (cm) | Weight (kg) |
XS | 86 | 76 | 40-50 |
S | 90 | 80 | 50-60 |
M | 96 | 86 | 60-70 |
L | 100 | 90 | 70+ |
XL | 104 | 96 | 70+ |
XXL | 108 | 100 | 70+ |
XXXL | 114 | 106 | 70+ |
Wavelength Women's Buoyancy Suit / Vortex Womens Barefoot Suit
Size | Chest (cm) | Waist (cm) | Weight (kg) |
6 | 84 | 64 | 40-50 |
8 | 88 | 70 | 40-50 |
10 | 92 | 74 | 40-50 |
12 | 96 | 80 | 60-70 |
14 | 104 | 84 | 70+ |
16 | 106 | 90 | 70+ |
Wavelength Junior Buoyancy Suit / Vortex Junior Barefoot Suit
Size | Chest (cm) | Waist (cm) | Weight (kg) |
6 | 60 | 56 | 22-40 |
8 | 62 | 58 | 22-40 |
10 | 68 | 62 | 22-40 |
12 | 72 | 68 | 40-60 |
14 | 78 | 72 | 40-60 |
16 | 82 | 78 | 40-60 |
Sands Barefoot Suit
Size | Chest (cm) | Waist (cm) | Weight (kg) |
XS | 86 | 71 | 40-50 |
S | 90 | 76 | 50-60 |
M | 96 | 81 | 60-70 |
L | 100 | 86 | 70+ |
XL | 104 | 91 | 70+ |
XXL | 108 | 96 | 70+ |
XXXL | 114 | 102 | 70+ |
When it comes to adjusting your slalom ski there are multiple facets that can come into play. From binding placement, to the fin and wing angle, these can all completely change the way your ski reacts. If you looking to adjust anything on your ski, make a note of where the ski was set from factory. Companies spend thousand of dollars working on these ski's, the way they come from the factory is normally where that ski will work for the majority of people using that model. From this point we recommend working on areas a t a time rather than changing a whole heap of things at once. This will allow you to pinpoint the differences of what each part will do and what works best for you.
Bindings
If you're starting to adjust your ski, we recommend that you start with the bindings, due to the fact that this is normally the easiest to adjust on the fly and easy to revert to standard settings. Almost all waterski companies will factory set the bindings to locate in the middle mounting spot. A great rule of thumb to work with is if you're starting out and skiing slower and on longer line lengths, a slightly more forward position can be better suited and allow the ski be more engaged on the water. For mid range skiers at the 28mph-32mph and stating to shorten, the factory middle settings will normally work fine for you. If you're really pushing it and getting up towards course speeds and short lines, setting your boots a little back to help with ski acceleration out of turns can be beneficial.
Fin
The other facet of the ski you can change is the fin, this can cause a drastic change in the way the ski handles. if you are moving the fin longitudinally we recommend that you shift it the same amount you plan on moving your boot to work in with the ski. Moving the fin forward will make the ski feel smaller on the water but allow it to turn quicker. Conversely, shifting the fin backwards will place more ski in the water, creating a more stable feel. Keep in mind when moving the fin not to shift it too far, work in 1/10 of an inch increments. It is also good to notice the depth of the fins from front to back. Changing the depth can lead to huge changes in the ski, raising the front of the fin will cause a ski to stick and take some pivot out of a turn, while raising the back of the fin will drive the ski forward and drive turns more. All in all the most simple way to explain this is that adjustments will control the pressure on the nose of the ski and at the end of your turn. Overall depth becomes dependent on your skiing ability, if you're just starting out and have an adjustable fin, the shallower the better as it will allow the ski to turn with ease. The deeper and harder you're getting into your turns, the deeper you will want the fin to increase hold and stop the tail 'blowing out'. If you find the ski is getting hard to turn, maybe adjust the fin back up a tad.
Wing
The final aspect of a ski that can be changed is the wing on the fin. This acts as brake to reduce the speed into the turn, so if you're just starting out you might want to think about making life easier on yourself and taking it out. If you are going to keep it in, factory settings tend to sit mostly around 7 to 10 degrees of angle, this will stop the ski pulling up at weird angles. If your adjusting the fin as a whole, then you will want to adjust the wing to balance and work with these settings. A forward fin movement will leave you wanting more angle on your wing, where a fin that is shifted backwards will require a wing that has less angle.
From this point, the rest is up to you. Or us if you want us to do it for you, we are happy to help in-store. Each company will also have pro recommended settings on their websites if you feel like skiing like the big guns.
Here at Skiforce we do our best to break things down on each product as much as we can, so you can decipher which ski is going to suit you best. If you want to speed the process up a bit though, this will give you the basic fundamentals of what to look for in a ski that will suit you.
To ensure you have the best time out on the water, getting yourself on the right ski is key. From a basic set of combo ski's for the young ones down to replacing your old black max with something all new and fancy, this guide will help you get you on your way
Below breaks down every aspect of the ski from skier and ski type to what speed and ski size you need to benefit your skiing career the most:
Skier Type
As much as we all like to believe that we are, we're not necessarily all World Champs. So ski levels are classified into 4 levels & your early starting double skiers (we try not to make it to confusing):
Course Skier
If you're this type of skier, chances are you're probably not reading this, if you are, then you must love everything waterskiing to be reading a guide! If you're at this level you're gonna be spending your time crushing buoys in a slalom course. This type of skier has one aim and one aim only in mind, get to the next buoy and hopefully the next shortening. Course Skiers will constantly shorten lines (32' off or more) and skis at competition speeds of 34mph to 36mph.
Advanced Skier
Advanced Skiers are confident in their ability and get picky with the water conditions, sticking to early morning or late afternoon for the flattest water and occasionally taking their skills to the course. With a solid technique and knowledge of body placement they ski on shorter rope lengths (22' off or more) but are out there for the love of the sport and ski in the 30mph to 34mph range.
Intermediate Skier
Intermediate Skiers are open to all sorts of skiing and will ski in almost any condition except a maelstrom. Mostly sticking to open water and free-skiing but have or have an interest to ski the course to get some progression. The idea is to ski for the fun of it, because big soul turns are where it's at. More likely to ski at a longer line length (15' off or more)and will ski at more easy speeds of 28-32mph. The idea is not to take things to over the top and keep it user friendly because no one likes the person who takes themselves too seriously.
Beginner Skier
Beginner Skiers are pretty much just taking the training wheels off and getting their legs under them on a slalom. These skiers at taking it easy at the slowest speeds in the 26-28mph range and might still be working on their deep water starts on a single. This is to provide a ski that's going to give them stability to get those deep water starts and start their basic cutting, because greatness has to start somewhere.
First-Timers (Double Skis)
Let's not do anything brash here, the best way to get a first timer up and skiing is on a set of double's. It's nothing against anyone, but we want to make sure they are comfortable and understand the basics and this is the best way to do it.
Ski Type
Ok so we've worked you out, but maybe you know where you're at and you're looking at something specific, well here we're going to give you a quick run down on the 3 major styles of ski's that you can come across in your local pro shop
Course Ski
Much like a course skier, a course ski is designed stiff, light and responsive with the intention of getting you from point A to B to C and so forth as quick as it can. These mean machines have been made and tested by the pros to crush buoys, but it doesn't mean it has to be that way. If you still want to ski tournament speeds and ski hard on a flat morning in the open water without the pressure of hitting targets, you still can (we won't tell anyone).
Cross-over
As it goes, the Cross-over tends to more signify an intermediate style skier or someone chasing a more agile open water ski. Normally a cross-over will carry a slightly wider profile, noticed mostly in the tail as well as a slightly softer flex pattern to allow the ski to handle smoother and release easier out of turns.
Free-ski
A ski designed with both beginners and guys who just want to get out there and lay down some big soul turns in mind, a Free-ski will normally have a noticeably softer flex pattern to allow for maximum bend and a slower release out of the turns. They also characteristically have the widest platform as these ski's are generally designed to be skied at slower speeds. The wider the platform the more stable and higher the ski will sit at slower speeds allowing you to always be comfortable.
Skier Speed
The Speed we ski at or choose to ski at depending on what type of skiing we're doing generally also has an impact on they type of ski we are chasing. The slower a boat speed the more surface area a ski will need to allow it to sit up in the water, conversely at course speed the ski can be considerably narrower. This guide is here to help work out your category depending on your comfort level or type of skiing to give you an accurate gauge of where to be at. Boat Speedo's can occasionally be out unless assisted with the use of Zero Off GPS Cruise or Perfect Pass, so keep in mind that your true ski speed may not be reflected off you boat speedo and you may need a GPS or Smart Phone.
36mph
This is competition slalom speed. You want to know what you're doing and be comfortable in a course and thinking about putting yourself in some comps at this speed. Note: You should never ski quicker than this on a slalom, this is where you should max out.
34mph+
This is the speed you will find where most confident and advanced waterskiers float around at, as its what your local competitions will be pulled at. If you skiing at this speed a stiffer ski is recommended to allow the ski to come out of turns under more load.
32-34mph
This is the speed where most skier who are just burning around the lake or river will find themselves at, whether it's due to comfort, where the boat speedo misrepresents a speed or for other reasons. This is the point where you will go slightly wider that a course ski, with around 2/10" extra width to provide greater buoyancy under the ski to still sit higher in the water and make skiing easier. Ski's designed for this speed tend to still carry considerable stiffness to allow the skier to still respond out of turns and maintain speed.
28-32mh
Now to the mid range of speed, where most intermediate range skiers tend to sit, With a bit of added width again you're looking at skis around 4/10" of an inch wider than course models, where you start to fall into mid wide model skis. As with the higher speeds the width is there for surface area, creating more buoyancy and allowing the ski to sit up in the water despite the slower speed and add stability. This speed ski normally will allow you to break from turns and sit steady behind a boat, but still get some confidence and edge to edge cuts going at a comfortable level.
This is your free-ski style speed, where Beginner or guys looking to take it easy ski at. With this speed you will be looking for a wider ski with a larger surface area to allow for greater buoyancy and stability, while also being softer and flexing more into and out of turns. These ski's won't roll between edges with much aggression and will provide much easier deep water starts with greater lift.
Ski Size
Ski size is determined by a number of factors, one being boat speed which is dictated above, the next is the weight and to a degree the height of a skier. The reason for this is you're not going to put a 60kg school kid on the same size ski as an All-Blacks Front Rower. As you put someone heavier or larger on a ski, you need to increase the ski size to add surface area for the ski to have increased lift on the water. If you look at our ski's, all of the models will have a recommended weight range based on the sizes and the speed the ski is designed to ski at. The reason behind not having an overarching size chart anymore is do with each individual ski design and width which affect the size you might choose between 2 different models. So once you have an idea of what ski models may suit you best check the size suggestions on each product page to suit you best.
There are some instances where you may choose to go a different ski size to what the chart recommends. One main one being for adolescents who are going through growth spurts or filling out and will grow between sizes quite rapidly, in this case a size up won't necessarily hurt. Another reason is based purely on personal preference, longer skis will generally be more faster but also more stable, while shorter ski's will be more nimble or 'twitchy' but can also lead to you suffering from fatigue faster. If you're moving from a ski that you bought 15 years ago keep in mind that over time technology has changed and ski's now have more surface area, are longer and initiate turns easier than they did in the past.
Ski Technology
Taking into account the factors above you can easily work out what category you're in. Now it's down to splitting between the remaining models in your class, this comes down to the technology of which the choosing the difference between two skis that are in the same category and fit your speed, build and type you will need to figure out the correct ski design. Below will give you the main key factors that are incorporated into every ski in different ways:
Base ConcaveBase Concave is the shape or hull on the underside of the ski that determines stability and ability to turn into your edges:
- Flat Spot Design: These types of designs are more prevalent on a wider body ski or Beginner style models, and are characterised by a flat spot on the base of the ski. This flat spot that rolls into a concave allows for water to flow in parallel with the ski and allow it to sit straight behind the boat with ease. This also allows for skis to turn off the base and lean at slower speeds without much resistance.
- Tunnel-Concave Design: This model uses a concave through the centre of the ski with a flat spot either side leading into the edge allowing the ski to sit higher in the water. Generally speaking the wider the flat spot outside the concave the more stable the ski becomes, whereas conversely the larger the concave between the flat spots the faster the ski will become and the harder it will edge.
- Full Concave Design: This concave runs the full width of the ski from edge to edge allowing the ski to initiate turns at almost just a thought. This style of concave also tends to give you the most lock and hold through a turn, the amount of depth in the concave also dictates how strong that hold will be you to have the strongest amount of hold in a turn, but also how much it strain that hold puts on your body. You will find that most advanced and course level ski's will make use of a full concave design
The edge bevel is the degree of angle in which the base meets the sidewall of the ski. Varying angles dictate how fast and reactive a ski will roll into and out of an edge, a smaller edge bevel and degree will cause the ski to pivot into an edge with speed and allow a ski to finish through a turn just as quick. As you go down the range of ski's the bevels increase and allow the ski to have an easier and mellower turn initiation and slow the turns down.
Stiffness
Stiffness is key to how a ski handles into and out of turns and the amount of stiffness will determine how aggressive the nature of the ski can be. How this works is as you initiate a turn and come through the turn, the ski comes under load and flexes. At the peak of your turn the ski will be under the most load and in its most flexed position. When a ski is under load energy is stored and the stiffer the ski the faster this energy wants to be released. A softer ski will release this energy more gradually and allow for a smoother or more forgiving release out of a turn. As we go to stiffer ski's the energy built up under load wants to be released more rapidly, leading to more 'spring' out of your turn and sending you across the wash faster. So what works for you? if you're pushing stiffer ski's and the ski is under load, your body is going to be also, so keep in mind if you're looking at a stiff ski you want to make sure your body can handle it, the last thing we want is an injury. Compare this to a softer ski, that is going to have considerably less load and allow for you to lean and even if you're out of position a little be able to hold those turns.
Now 2 things lead to stiffness, core and laminates, most ski breakdowns here at Skiforce.com will tell you which ski's have what, but the basic breakdown goes as follows:
- Core constructions in 99% of cases will come down to a PU core or a PVC core. A PU core is both softer and cheaper to buy and mold, the advantage is a ski that is going to be easier to ski on though a touch heavier. A PVC core on the other hand is lighter, stiffer and also about 8 times more reactive than PU, allowing a ski to sit higher in the water, be more lively and pop out of those turns with more energy. (Note: PMI is now also a core used in Radar's Probuild Models, this is about 6 time more reactive than PVC and will explode out of turns)
- The second aspect of stiffness is the fibreglass lay up and the addition of carbon and the amount of it. Fibreglass can be applied in varying thicknesses to add stiffness, to give you an idea a ladies ski will generally have less layers of fibreglass in comparison to a mens ski. The addition of carbon will do exactly what you expect carbon to do, create more energy storage and a faster energy release for more response a a faster reaction time, you will normally start to see carbon included from the higher end intermediate range and up.
The world of wakeboards can be a hard place to navigate sometimes, so we do our best to help you out with the hard hitting questions. Tackling one of the big ones for the general weekend rider, the difference between Boat and Cable wakeboards.
Boat Boards
In most cases boat wakeboards will have a Polyurethane core construction and be considerably reinforced around the centre of the board to create stiffness. The reason for this is so the board can maintain its shape and 'pop' over time for longevity.
Why can't I use a boat board at the cable park?
There is nothing to stop you from doing it, though in most cases if you looking at tackling obstacles, this can significantly reduce the life of your board. Most boat boards aren't equipped with grind bases and so can wear through the base quite quick. Another issue is that boat boards are considerably stiffer than most cable models, this leads to harder impact on obstacles and tougher landings
Cable Boards
Cable wakeboards are reinforced in a different way, with most cable boards have a wood or part wood core, to allow for natural flex and give on obstacles and kickers. Another key feature of Cable boards are sintered or 'grind' bases to protect them from hitting obstacles and urethane or ABS sidewalls to protect from any unwanted hits and reduce the chance of your board splitting.
Why can't i use a cable board behind the boat?
Once again there is nothing from stopping you and it is much more feasible than a boat board at the cable park. The reasons why it's not ideal is that wood cores in most cases create more flex and so don't generate the same amount of 'pop' or vertical height and carry as boat boards. Another effect is wood core boards tend to want to flatten out over time, with speeds being faster behind boat than cable this accelerates the process and can slightly reduce the life of your cable board
Hybrid Boards?
There is definitely models that fall mid way between the 2 categories, but over the years they have become less and less common with most major brands ruling them out as viable models. This isn't to make you buy 2 boards, but more so because you would be sacrificing something that would benefit your boat riding to gain a slightly better cable feel, whether it be stiffness, grind base or sidewalls.
Please keep in mind that these are rough size guides and for more accurate sizings on each model, please check the size recommendations on each individual board to determine your exact size.
Rider Weight (kgs) | Wakeboard Length (cm) |
Less than 45Kgs |
Less than 130cm |
40Kgs - 68Kgs |
130cm to 135cm |
59Kgs - 82Kgs |
135cm to 140cm |
77Kgs - 110Kgs |
140cm - 144cm |
90Kgs - 15Kgs + |
Greater than 144cm |
Getting the Right Wakeboard Length
There are two key factors that go into making sure you get the right size wakeboard. Firstly is your weight, as you need greater surface area to provide you with the float you need to sit higher on the water. Secondly is your personal riding style, this can always be taken into effect as some people naturally prefer riding longer boards to shorter board, which we will explain in a minute. Keep in mind that if you're buying for a group, buy for the person who rides the most or is on the upper end of the weight scale. Also to note is that each board has a different surface area so it is always a a good idea to check the recommended sizing on a specific board model.
Riding Different Wakeboard Lengths
Shorter WakeboardsIf your'e looking to ride a shorter board, here's what to take into account. You will be riding a board with a smaller surface area, causing more drag and most likely speeding up the fatigue process due to lack of buoyancy causing more energy expenditure. The shorter board length can also lead to harder landings and if you land out of form can cause an easier edge grab and eyelid peeler. The benefits of a shorter board though come in its aerial capabilities as a shorter board will be easier to manoeuvre once out of the water making spins and inverts easier to engage.
Longer Wakeboards
The longer a wakeboard is will normally make it easier to ride and start out as a beginner. They will feel stable underfoot with greater surface area, help on deep water starts and help to get 'pop' off the wake for easier height. A longer wakeboard will also create better float on top of the water for added speed and allow for more control in your edges. The opposite to a shorter board, a longer board will become harder to control and initiate moves once out of the water, as more weight and board cause it to be harder to get inverted and twist.
Wakeboard Ability Level
Like most things in the waterski industry, wakeboards can be broken down into ability classes. This isn't the be all and end all as provided a wakeboard is in the right size bracket, anyone can realistically ride any wakeboard. It comes down to how easy that board will be to ride for a person dependant on their level in comparison to the level of the board. Once again this will not stop you from riding a certain wakeboard and some people tend to thrive in that trial by fire situation. But as a general rule of thumb there will always be ability levels as stated below:
BeginnerThese are for the guys who have never ridden before or ride only occasionally. You're beginning to cross the wake and start or start to jump and want to make life easy. Traditionally these boards will have mellower rockerlines on them, normally continuous or a mellower 3-stage. they also tend to be budget friendly to get you into the sport without costing you a fortune.
Intermediate
At this point you should be comfortably moving freealy about the water and clearing the wake on both toe and heel-side edges. At this point boards tend to expand and have more personality, so you should check in on what aspects of wakeboards work for you and your riding style below.
Advanced
Alright, now you know where you're at. You've started to get a small trick base together, you're spinning, flipping out and trying to expand your trick bag. When it comes to these ranges of boards, you are going to be tailored styling of board. You get to choose if you want to be aggressive or have a smooth surfy ride, if you want something thats going to boost you the moon or have a smooth transition from wake to wake. To put it in simple terms, these boards are ridden and tailored to the pros, so no matter what you get it's high end
Wakeboard Rockers
Continuous RockerContinuous rockerline were the first rockerline designs around and tend to provide both the smoothest and fastest rides, allowing you to get into your edges and get those harder pressing carves on buttery water. The other advantage of a continuous rocker is its consistent and predictable 'pop' or height off the wake and allows for more carry across the wake and into the flats. Not only does this make it feel easier on the body on landing but can be a real confidence boster to the ego.

3-Stage Rocker
This rockerline is typically signified by itsvisually noticeable 3 panels in its design with a pivot point where the 2 ends kick up. The advantage behind this is to create a more abrupt and vertical pop at the point of contact with the wake to give you more height but less carry, these guys are all about height. The downfalls of a 3-stage rocker is its desire to plow through the water due to its abrupt kick and so will have a slower feel they will also have a slightly looser feel when boat speed is increased and have a slightly harder landing due to reduction in carry across the wake.

Wakeboard Core Constructions
PU Core
The most common core that you will find in a boat wakeboard, a PU core balanced weight reduction with strength. The advantage of Polyurethane is that it will still allow for the stiffness required to give you the 'pop' or height off the wake you're chasing, but not breakdown over time or crumble over the wake like a wood core. In most cases these guys are borderline bulletproof and you will have to work to break them. Or ride A LOT.
PVC Core
Much like a slalom waterski a PVC core is used firstly to reduce weight and secondly due to its reactive nature. PVC is stiffer and 8 times more reactive than Polyurethane so it's not a common occurrence in a wakeboard. The advantages are in boards that are looking for a more aggressive ride that will grab and dart through edges and explode off the wake. In this cause you would expect an 3-stage rocker or aggressive continuous rocker and in most cases a sharp rail.
Wood Core
Wood core wakeboards generally are associated with cable boards, but do lend themselves to a handful of boat style boards, the reason for this is woods absorbent and flexible nature. A wood core board will allow to naturally flex over kickers, slider and any other obstacle you can think of and hold up to the abuse, they also absorb the impact on landings quite well, softening landings off obstacles or from the air.
Wakeboard Base Features
Concaves
Rolled moldings in your base that reduce the amount fo drag that water will produce on the board, allowing you to ride faster thanks to greater lift and upwards pressure on the board.
Base Channels
Have a double purpose acting as water disruptors to break up tension on the water, as well as providing a greater flow of water through the edge for control.
Centre Spines
Centre spines are there to help pivot you into your edges and make transitions easy. They also double down to soften landings and tend to be a key feature of 3-stage model boards due to the nature of their vertical 'pop'
Featureless Base
This is in 99% of cases the key feature of a cable model wakeboard, devoid of any shapes or fins on the base, it is reliant purely on the rocker and core construction of the board to help it react and ride. They also slide over obstacles easier hence the cable association.
Grind Base
These bases are designed pretty much with cable riding in mind, normally a tougher sintered style of base to hold up to the wear and tear off obstacles at the cable park.
Wakeboard Edges
Sharp RailA sharper edged rail will react more aggressively and track harder into the wake. This style of rail tends to lean more towards fast acceleration that will drive through to the wake at top speed. The side effects of a sharper rail is that it the harder edge bite can also lead to easier edges being caught and giving you the eyelid peeler effect. When it comes to sharper rails, you want to be all about going big and getting the most out of your aerials, as they don't adapt well to surface tricks.
Variable Edged BoardsA variable edged board will give you that sweet spot between a board that will edge with intent but have a more forgiving or 'softer' feel through the centre. With a sharper tip and tail that blends to a fuller rounder rail in the centre allows the board to release easier on butter and get out some soul turns and carves. The softer centre edge also allows for a more progressive cut into the wake with more control, so you can gradually build speed into the wake and generate vertical pop.
Wakeboard Fins
Fins will determine the amount of grip that you have on the water, some will be bigger for added grip or smaller for a loser ride. Some will also be molded or screw-in. Let's have a deeper look at the differences
Wakeboard Fin Placement and SizeFin placement is a big one, as you go from beginner through to advanced, you will notice less fins (from 6 or more to say 4). The more fins and the bigger fins, the more stable your ride is going to be and the harder it will be to get the board to release from the surface of the water. once you got to higher end boards, you will notice smaller fins and normally no centre fins, this allows for greater edge pressure and easier release off the wake and the surface of the water.
Removable vs Molded-In Wakeboard Fins
Alright, so this seems pretty self explanatory right? A removable fin is a screw in fins either on the outside edges of your board or in the centre, a molded-in fin is fibreglassed into the mold of the board. The difference in feel is a removable is much more customisable and can tend to be sharper and more responsive due to the way they square off against the board base. A molded fin will give a smoother feeling ride and tends to make moving into edges easier.
Wakeboard Maintenance
Like a car or a boat, wakeboards need maintenance, maybe not as much as those but still, if you want to get the longevity out of your board always do the following
- Keep your wakeboard out of the sun for long periods of time. UV rays beating down on your board is like backing in the sun without sunscreen.
- At the end of the day give your gear a hose down with fresh water.
- Check over Fins bolts and Binding Bolts regularly to reduce strain on the board and losing anything
- For maximum protection, make sure you have yourself a cover. A cover will do exactly what you think, protect from scuffs, bumps, scratches, friends who don't care because it's not theirs. You name it, a bag will help.
- Store your gear in a cool, dry location.
There are a few factors that come into play when choosing a wakesurfer. Some are based on the rider and others are based on a bit of personal preference and what you're chasing. Surfing is much more of a recreational sport and means you can use our guide right here at Skiforce to work out what wakesurfer will work best for you
Length & Volume
The length of a wakesurfer is measured in feet and inches like a traditional surfer, but which size you choose in each model is to a degree personal preference. Despite this though a wakesurfer will still have a weight recommendation based on the volume of a wakesurfer and the model (if you're carrying a bit of extra Christmas lunch weight, you're probably not going to want to ride the smallest size). Below we will give you the breakdown between bigger and smaller wakesurfers:
A larger wakesurfer has more volume and in turn has much more float allowing for those of us that like to... ahem. enjoy our summers. The other advantage of a bigger board is for boats with smaller waves or less push, the added float balances out the wave. They're also great for beginners.
A smaller wakesurfer is going to be considerably more manoeuvrable and faster on the wave. If you're more confident in your ability on a wakesurfer, then a smaller board will probably be more your go to. In this case though, it is handy to note that a smaller board will not suit smaller waves unless it's for a little tacker.
Wakesurf Shapes
Wakesurfers are derived from 2 major categories, your traditional style surfboard for out in the swell and skim style boards. The reason for this comes down to giving you the full choice of what is possible behind a boat, leading to 3 classification on surfers; Surf style, Hybrid style and Skim style.
Surf ShapesA surf style is exactly what it sounds like, a shape that is inspired by surfboards or more specifically shortboards. Only smaller again. They are always going to be directional in nature (if you're planning to spin, make sure you go the whole way round) and generally have a wider tail, whether that be squared off or a fish style. When it comes to surf style wakesurfers, you're pretty much guaranteed they are going to be buoyant and track super easy thanks to overall large volume and plenty of fin options. Best part you can pump, push or lay out big soul enriching turns on these bad boys.
This is what you expected it to be, a hybrid of both surf and skim that will do a bit of both but not be entrenched in either. These shapes will borrow from both, normally more buoyant and floaty, but they will also be shaped to suit a freer flowing style that can be thrown around with ease. To put it simply the freedom of a skim board, balanced with the comfort of a surf. The best part you will have a few fin setups that allow you to adjust the feel of the board as well.
These guys are short, loose and way more playful on the water then the above mentioned. Using smaller wakeboard style fins, a less buoyant design and normally a flat base. A skim style will be much slipperier on the water as opposed to a tracking surf style, but release with ease. If you fancy yourself as one of those guys that seems to always be good at everything, these guys will spin, slide and pop off the wave with ease. Just don't try to soul turn them unless you want a nice serving of lake water.
Wakesurf Sizing
Sizing on wakesurfers is very subjective and here at Skiforce.com each product will have a sizings and corresponding weight ranges for that surfer. The reason for this is due to the sizings and volume of each board leading to greater buoyancy in say a certain surf model in comparison to a skim board.
Another factor that influences size is dependant on your boat wake, the bigger and faster your boat wake, the short you can ride. If you're riding a smaller wake or the wave has less 'push' you might want to ride a longer board to give you some extra float and push
Wakesurfer Construction
Compression MoldedThe most durable of the constructions, a compression molded design is firstly the heaviest of the constructions in most cases, but will also stand up to trials and tribulations of daily boating life. This construction is normally made by cooking the outer shell in a press like a toasted sandwich, except with more pressure obviously. This creates the tougher exterior. While being relatively easy and inexpensive to do, the one downfall to this process is the core that is used will normally be a denser core to not burn out.
Dura-Shell, Surface Construction
Everyone has their own name for this type of construction. Made in a similar way to the compression molded style boards, through that sandwich press process, the dura-shell or surface style use a lighter core and essentially slow cook the board to perfection. The advantage, a much lighter board with all the strength of a compression molded. The downfall? it's more expensive and takes considerably longer. Think cooking chicken in a microwave to slow cooked lamb, you know the slow cooked meat is going to taste better, it just takes so DAMN LONG!
Vacuum Sealed
Now we get to your more expensive processes, a vacuum sealed style of construction can use the lightest cores and creates a finish that allows every board to be identical and free of blemishes. The is done by the outer layer being applied and then formed in a bag that removes all the air for a tight and precise finish. These guys will typically surf the best between compression molded and dura shell, having less friction and more glide speed.Just note, these can damage easier and should be treated with care
Full Surfboard Style
This is the primo, we're not talking like a surfboard here, this is a surboard, just shorter. Hand constructed by bloke in his garage to the best specs that a wakesurfer can be. They will provide a full surf experience that will feel like you're out in the swell on your local back beach. Just note, like a surfboard, these can damage easier and should be treated with care
Rocker
Minimal RockerThis will make a wakesurfer faster on the wake and give you a smoother ride (eg. skim style surfers).
Increased Rocker
This causes make a wakesurfer slower and will act like a bit of plow leading to bigger sizings in those models. These will be more reactive and respond to the wave more.
Rails
Sharp RailA sharp rail is designed to give you more bite and react faster when you lean into your edge, giving you a faster response and a quicker snap through the wave.
Full Surf Rail
Just like a surfboard a fuller surf rail will make the board slightly slower but will be more forgiving and roll through its edges with added smoothness, leading to the ability to do hang out those big floaty carves.
Wakesurf ropes and handles firstly are considerably shorter in length as well as thicker. This is a slow speed close to the boat sport, so a 60-80ft rope is probably going to be a bit pointless. The thickness of the rope serves a dual purpose, to take the strain off your body at high torque and to give you an easier grab to pull yourself into the 'sweet spot'. Once you find that sweet spot you can throw the handle back to the boat and be on your merry way. The other reason to stray from wake ropes, they are thinner and tensile. This firstly is harder to grab and pull yourself forward, but can also get tangled and wrap around the surfboard or the rider leading to injury.
Wakesurfing and The Boat
We recommend that you only wakesurf behind an inboard engine boat. This is 100% for safety reasons, outboard engines expose a rider to the prop and we don't recommend that you take that on, the last thing we want is a scene from an Alfred Hitchcock film. What's a Good Boat Speed?We've found that depending on your boat, a good speed to work off is 10mph to 12mph. This can also be affected by river flow if a river is your local waterway.
How does a boat throw a good wake for wake surfing?
To go wakesurfing, your boat will need to carry some extra weight or have added ballast. adding weight to the centre and side of your boat, will increase the size of your surf wave and in turn, your surf experience. Theres a few weight techniques to help with your surf wave. Firstly is the most common nowadays, most boats will have an inbuilt ballast system, this gets rid of all the work. Secondly is to get external ballast bags, which you can fill with water to weight the boat down, once you fill them though you won't be moving them easily. Lastly is anything you can find that is heavy, bricks, random blocks of lead, your 'fluffy' cousin Rick, a dead body. That got dark... maybe disregard that last one.These factors will help fatten up your wake for a great day.Like almost anything to do with wakeboarding, your boots are key and will ultimately decide how your day goes more than your board. Making sure you have the right boots to suit your needs is as easy as breaking down 3 main factors, these are incorporated into almost any boot so the information is applicable across every brand:
Flex
One of the most important factors when it comes to your boots is making sure you have the right flex to suit you and your needs. The flex of a boot can completely alter the way your board handles, so while they can be classified as soft for beginners and stiff for advanced riders, this still very much factors as a personal preference. If you prefer a boot that locks down your heel and has a tonne of response you will probably want some thing stiff. Alternatively if you want to get right into your grabs and tweak your tricks, you would look towards something a bit softer.
In a way boots factor in very much the same way as a pair of snowboard boots, stiffer creating more response and softer more manoeuvrability. Here at Skiforce we try to make things as easy as possible, so for a tailored experience check out each boot model which will have a rating out of Soft, Mid and Stiff to suit what you need.
Fit & Features
Most boot features vary between models as some will use different technologies to create comfort, stiffness and support. While these change one thing that won't is the fit, the last thing you want are a pair of boots that crush your foot. When it comes to fit there are a few factors to take into account which will affect it as some boots are designed to cover multiple foot sizes, allowing your buddy who's a size 8 to fit your size 10 boots. Other higher end boots are more tailored to your foot, with a more specific sizing you want these boots to sit firmly over your foot and have the ability to be heat molded, taking you on a trip to comfort town and keep you riding all day.
Wakeboard Boot Style
When it comes down to boot style, it can become very much a personal preference, you may like the feel of an open toe boot, or a beginner may want the comfort and support that comes with a high end boot. Below we will run through the main benefits and differences between the key 3 styles:
Open-ToeThese guys are perfect for any beginner or a boat board that is going to have a whole heap of people using it. The advantage to open toe's is the wider size range, allowing for Uncle Sam's size 14 to fit in your cousin Joeys size 11 boots. Another benefit when it comes to open toe boots is if you've got young un' about to go through a growth spurt, you can get a little longer life out of them (mum and dad don't want to be buying a new pair every year you know).
When you're looking for a more personalised boot the closed toe boot is the way to go. These boots create a full closure over your foot, increasing the amount of control and leverage you can get over edges. This ultimately leads to great response time and guess what, they even keep your tootsies warm on those brisker days. Note though that closed toe boots are normally in the higher end range and can carry a higher price tag than the open to counterparts. Apparently that's the price of comfort and support.
System bindings are unique to Hyperlite and take their cues from the snowboard industry with an independent boot and binding. The advantages that come with this are a boot that is even more fitted and customised to you. The system binding also allows the pressure of leaning into edges to be dispersed across your leg rather than just your heel and toe.
Shipping
- Free regular shipping with 'leave at your door' within 1 to 7 business days
- In-store collection available 24 hours after order being placed
- Express delivery options also available
- See our Shipping & Handling Page for further information and delivery times
Returns And Exchanges
- Accepted within 30 days of purchase
- See our Returns & Exchanges page for more information
WISH LIST AND COMPARE
Do you want to add products to your personal account?
Size Guides
Here are our links to both sizing guides and buying guides on our products, all these are here to help you make an informed decision on what size or product will work best for you.
Waterski Buy Guides
Wakeboard Buy Guides
Buying the Right Wakeboard
Wakeboard Size Guide
Wakeboards: Boat vs. Cable
Buying the Right Wake Boots